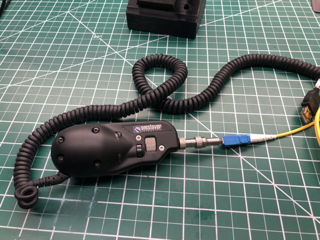
I have a Westover Scientific P5000 fiber scope. I like the device itself, but the last time ThermoFisher released software for it was 2010, and it required Windows® XP or Vista Operating System (or, with much fighting, possibly Windows 2000). Based on the price of the device this is annoying, but ThermoFisher seems to often abandon their products.
Anyway, I haven't been able to find a nicer fiber-scope, and it was really annoying me that I could no longer use this one - it's basically just a camera and some funny optics, and so I decided to try and fix it (the other alternative was tidying my office, and that sounded like less fun...) I ended up swapping out the sensor and electronics for a cheap webcam module. Here is my build journey in case anyone else wants to do the same...
It uses Torx screws (for some reason the optics module uses security Torx).
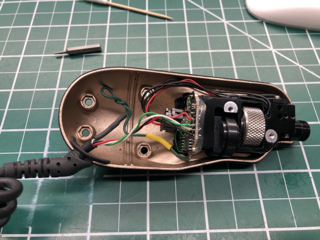
Inside is an optics package, a small sensor board, and a larger video to USB board. Connecting the two boards together is a flat-flex cable. It uses the same cable that the Raspberry Pi camera module uses; I was initially excited, hoping that this might be a standard pinout, and I could just slap a Raspberry Pi in intead, but no such luck. I pulled out the electronics, and then took apart a Logitech webcam, hoping that I could replace the sensor module with the guts from the Logitech - this almost worked, but like the fiber scope the webcam has two boards, and the connector on the sensor board faces "forward", which would get in the way of the optics package. The connector seems to be 0.2mm pitch, and so it wasn't really fesiable to desolder it and run nrew traces or move it to the back of the board.
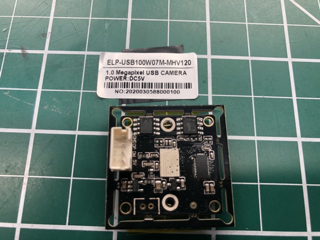
Instead I found a small USB webcam module - ELP megapixel Super Mini 720p USB Camera Module with 120degree Lens and replaced the sensor and electronics with this. Unfortunatly it did require carving a way a little bit of the casing with a Dremel tool, and I got a bit impatient and cut all the way through, but it still looks and works well.
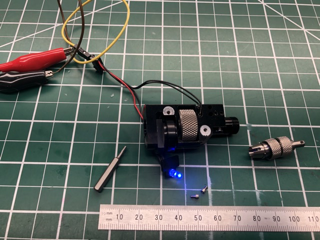
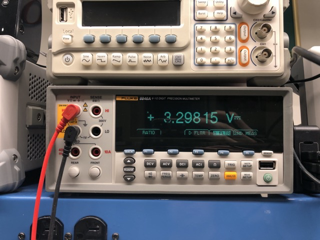
Picture of the optics module. It is basically a microscope, and a blue illumination LED, with a 45-degree beamsplitter to allow the LED to illuminate the front surface of the fiber. The LED sits in the front, and seems to be powered by ~3.3V
The webcam module - this was $29USD from Amazon. The webcam module I chose has a 120 degree field of view, but this isn't really important, because I remove all of the optics and am only using the sensor. The module itself on a (I'm guessing?) standard size PCB, but has "slots" to allow the outer part of the board to be removed.
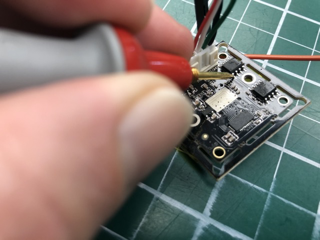
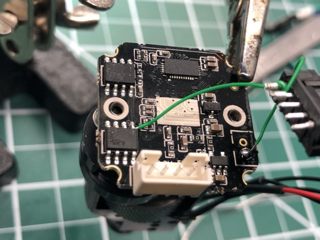
Finding a handy 3.3V source to power the LED. There is a handly looking set of contacts (lower left), unfortunatly they are GND and USB 5V. Probing around I found a handy 3.3V supply
Snipping off the "break away" outer board. I'm assuming that both the outside and inside boards are a standard size

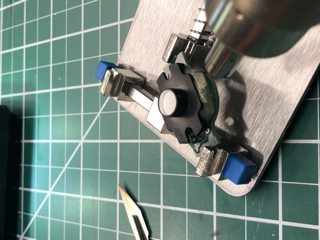
Removing the original sensor mount from the sensor board. The adapter screws into the back of the optics package, and protects to sensor. I used a heat gun to heat up the mounting glue, and popped it off. After removing the lens assembly from the new webcam module, it slides nicely into this mount, and a dab of hotglue holds it nicely in position. The adapter has some slots to allow fine-tuning of the sensor position.
In order to make this particular webcam module fit, I had to trim the case slightly with a Dremel tool - I'm sure I could have found a smaller camera module (I considered using an endoscope, but that seemed like more trouble than I wanted to deal with). I got somewhat impatient / over-enthusiastic, and ground through the edge of the case, but a smaller board or a bit more patience should solve this. I also added some pennies to give the unit a slightly nicer heft.
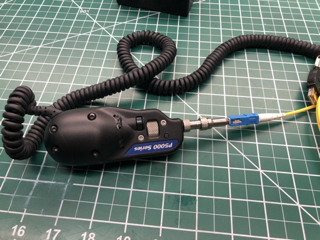
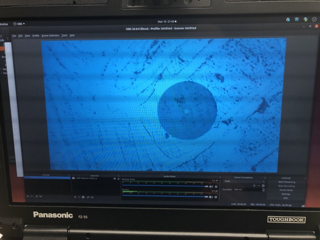
As it now contains a standard webcam, this now works perfectly on Linux and Apple macOS X devices without any sort of drivers